Want to refresh your bedroom with a new coat of paint? This guide offers bedroom painting tips and walks you through the entire process, from prepping the room to applying the final touches. We’ll cover everything from how to prepare a bedroom for painting to selecting the best bedroom paint colors and finishes.
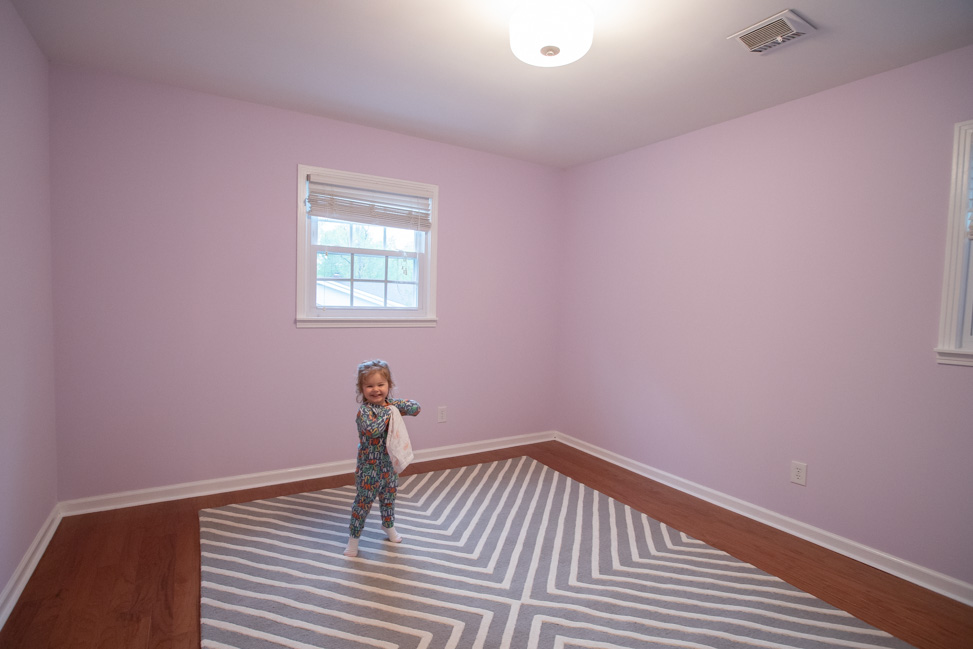
Image Source: www.camelsandchocolate.com
Planning Your Bedroom Transformation
Selecting the Perfect Paint
What are the best bedroom paint colors? The best paint colors for a bedroom are those that create a relaxing and inviting atmosphere, such as blues, greens, grays, and soft neutrals. Personal preference, the size of the room, and existing décor also play important roles.
Choosing the right paint is more than just picking a color; it’s about setting the mood. Consider these factors:
- Color Psychology: Colors evoke different emotions. Blues and greens are calming, while warmer tones like yellows and oranges can be energizing.
- Room Size: Lighter colors make small rooms feel larger and airier. Darker colors can make a large room feel cozier, but can overwhelm a small one.
- Lighting: Natural and artificial light can significantly change how a color appears. Test paint swatches on your walls before committing.
- Existing Décor: Coordinate your paint color with your furniture, bedding, and accessories.
Picking the Right Paint Finish
What paint finish should I use in a bedroom? The best paint finish for bedroom walls is typically eggshell or satin, as they offer a good balance of durability and washability without being too glossy. Flat paint is another option for ceilings and low-traffic areas, as it hides imperfections well.
Here’s a breakdown of common paint finishes and their uses:
| Finish | Characteristics | Best Use |
|---|---|---|
| Flat/Matte | Non-reflective, hides imperfections well | Ceilings, low-traffic areas |
| Eggshell | Low sheen, easy to clean | Bedroom walls, living rooms |
| Satin | Slight sheen, more durable and washable than eggshell | Bathrooms, kitchens, children’s rooms |
| Semi-Gloss | High sheen, very durable and washable | Trim, doors, cabinets |
| Gloss | Highest sheen, extremely durable and washable | Accents, furniture, high-use areas |
Calculating How Much Paint You Need
Accurately estimating the amount of paint needed will save time and money. Here’s how:
- Measure the Walls: Measure the length and height of each wall.
- Calculate the Area: Multiply the length and height of each wall to find its area. Add all the areas together to get the total wall area.
- Subtract Openings: Measure the area of windows and doors and subtract that from the total wall area.
- Estimate Paint: One gallon of paint typically covers 350-400 square feet. Divide the total wall area by 350 to determine how many gallons you need. Always round up.
- Factor in Coats: For a fresh color, you’ll likely need two coats of paint. Double the amount calculated above.
Example:
A bedroom with a total wall area of 450 square feet, after subtracting windows and doors, would require:
450 sq ft / 350 sq ft per gallon = 1.29 gallons
Rounding up, you’ll need at least 2 gallons for two coats.
Preparing Your Bedroom for Painting
How do I prepare a bedroom for painting? Preparing a bedroom for painting involves removing furniture, covering floors, cleaning walls, filling holes and cracks, and taping off trim and windows. This step is crucial for achieving a professional-looking finish.
Gather Your Supplies
Before starting, assemble all the necessary tools and materials:
- Paint: Based on your color and finish choices.
- Primer: Use a primer to ensure better adhesion and coverage, especially when painting over dark colors or stains.
- Paintbrushes: Choose high-quality brushes for cutting in and painting trim.
- Rollers and Roller Covers: Select the appropriate nap length for your wall texture.
- Paint Tray and Liners: Make painting easier and reduce cleanup time.
- Painter’s Tape: Use high-quality painter’s tape to protect trim, windows, and doors.
- Drop Cloths: Protect your floors and furniture from paint splatters.
- Spackle or Joint Compound: For filling holes and cracks.
- Sanding Sponge or Sandpaper: For smoothing patched areas.
- Putty Knife: For applying spackle.
- Cleaning Supplies: Soap, water, and a sponge for cleaning walls.
- Ladder or Step Stool: For reaching high areas.
- Screwdriver: For removing outlet covers and switch plates.
Protect and Clear the Space
- Remove or Cover Furniture: Move furniture out of the room or to the center and cover it with drop cloths.
- Protect the Floor: Cover the entire floor with drop cloths or plastic sheeting, securing it with painter’s tape.
- Remove Fixtures: Take down light fixtures, curtains, and artwork.
Cleaning and Repairing Walls
- Clean the Walls: Wipe down the walls with a damp sponge and mild detergent to remove dirt, dust, and grease.
- Fill Holes and Cracks: Use spackle or joint compound to fill any holes or cracks. Apply the compound with a putty knife, smooth it out, and let it dry completely.
- Sand Smooth: Once the spackle is dry, lightly sand the patched areas with a sanding sponge or sandpaper to create a smooth surface.
- Dust the Walls: Remove any sanding dust with a clean cloth or vacuum.
Taping Off Trim and Edges
- Apply Painter’s Tape: Carefully apply painter’s tape along the edges of the trim, windows, doors, and ceiling.
- Ensure a Seal: Press the tape firmly to create a tight seal and prevent paint from bleeding underneath.
The Painting Process
Priming the Walls (If Necessary)
Do I need to prime before painting my bedroom? Priming is generally recommended when painting over dark colors, stains, or porous surfaces. Primer helps to create a uniform surface, improves paint adhesion, and enhances color coverage.
- Apply Primer: Use a brush or roller to apply a thin, even coat of primer to the walls.
- Let Dry: Allow the primer to dry completely according to the manufacturer’s instructions.
- Inspect and Sand: After the primer dries, inspect the surface for any imperfections. Lightly sand any rough spots.
- Clean Again: Wipe down the walls to remove any sanding dust.
Cutting In
What is ‘cutting in’ when painting? “Cutting in” is a painting technique that involves using a brush to paint the edges of walls, trim, and ceilings before using a roller on the larger surfaces. This creates clean, crisp lines and ensures even coverage in hard-to-reach areas.
- Choose a Brush: Use a high-quality angled brush for cutting in.
- Load the Brush: Dip the brush into the paint, but don’t overload it. Tap off any excess paint.
- Paint the Edges: Carefully paint a 2-3 inch wide strip along the trim, ceiling, and corners. Use a steady hand to create a clean line.
- Feather the Edges: Feather the edges of the painted strip to blend it smoothly with the rest of the wall.
Rolling the Walls
- Load the Roller: Dip the roller into the paint tray, ensuring it’s evenly coated.
- Roll the Walls: Start rolling the walls in a “W” or “V” pattern, overlapping each stroke to ensure even coverage.
- Maintain a Wet Edge: Keep a wet edge to avoid streaks and ensure a smooth finish.
- Work in Sections: Work in manageable sections to prevent the paint from drying before you can blend it.
Painting a Bedroom Ceiling
How do I paint a bedroom ceiling? Painting a bedroom ceiling involves using a roller with an extension pole to apply even coats of paint. Work in sections, overlapping each stroke, and wear protective eyewear to prevent paint from dripping into your eyes.
- Protect Yourself: Wear safety glasses or goggles to protect your eyes from drips.
- Use an Extension Pole: Attach an extension pole to your roller for easier reach.
- Apply Paint: Roll the paint onto the ceiling in overlapping strokes, working in sections.
- Avoid Drips: Don’t overload the roller with paint to avoid drips.
Painting Bedroom Trim
Should I paint the trim before or after the walls? It’s generally best to paint the trim first. If you accidentally get paint on the walls, it’s easier to tape over the trim and touch up the wall paint later.
- Prepare the Trim: Clean the trim with a damp cloth and lightly sand any glossy surfaces.
- Apply Primer (If Necessary): If the trim is stained or painted with a dark color, apply a coat of primer.
- Paint the Trim: Use a brush to apply even coats of paint to the trim, allowing each coat to dry completely before applying the next.
Applying a Second Coat
How many coats of paint do I need in a bedroom? In most cases, two coats of paint are sufficient for achieving full, even coverage in a bedroom. However, if you’re painting over a dark color or using a low-quality paint, you may need to apply a third coat.
- Let the First Coat Dry: Allow the first coat of paint to dry completely according to the manufacturer’s instructions.
- Inspect for Imperfections: Check the walls for any imperfections or missed spots.
- Apply the Second Coat: Apply a second coat of paint using the same techniques as the first coat.
- Allow to Dry: Let the second coat dry completely.
Finishing Touches
Removing Painter’s Tape
- Wait for Paint to Dry: Wait until the paint is dry to the touch, but not completely cured.
- Score the Edge: Use a utility knife to score along the edge of the tape to prevent the paint from peeling off the wall.
- Peel at an Angle: Slowly peel the tape away from the wall at a 45-degree angle.
Cleaning Up
- Clean Brushes and Rollers: Wash brushes and rollers with soap and water or the appropriate solvent for the type of paint used.
- Dispose of Waste: Dispose of paint cans, used tape, and drop cloths properly.
- Store Leftover Paint: Store leftover paint in a tightly sealed container in a cool, dry place.
Reassembling the Room
- Replace Fixtures: Reinstall light fixtures, curtains, and artwork.
- Move Furniture Back: Carefully move furniture back into the room.
- Enjoy Your Newly Painted Bedroom: Step back and admire your freshly painted bedroom.
DIY bedroom painting: Tips for Small Spaces
How can I make a small bedroom feel bigger with paint? To make a small bedroom feel bigger with paint, use light, neutral colors such as white, cream, light gray, or pale blue. These colors reflect light, creating a sense of spaciousness. Avoid dark or overly saturated colors, as they can make the room feel smaller and more enclosed.
- Use Light Colors: Opt for light, neutral paint colors to maximize the sense of space.
- Vertical Stripes: Paint vertical stripes on one wall to create the illusion of height.
- Monochromatic Color Scheme: Use a monochromatic color scheme to create a seamless and cohesive look.
Advanced Bedroom Paint Techniques
Want to go beyond a simple coat of paint? Here are some advanced techniques:
- Accent Walls: Create a focal point by painting one wall a different color or using a bold pattern.
- Stenciling: Use stencils to add intricate designs to your walls.
- Color Washing: Apply a thin, translucent layer of paint over a base coat to create a textured, aged look.
- Ombre: Blend different shades of the same color to create a gradient effect.
Fathoming Color Schemes
Deciding on a color scheme might seem daunting, but breaking it down simplifies the process. Here’s a look at popular options:
- Monochromatic: Uses different shades of the same color for a serene and unified look.
- Analogous: Combines colors that are next to each other on the color wheel, such as blue, blue-green, and green.
- Complementary: Pairs colors opposite each other on the color wheel, like blue and orange, for a vibrant and contrasting effect.
- Triadic: Uses three colors evenly spaced on the color wheel, such as red, yellow, and blue, creating a balanced and dynamic scheme.
Frequently Asked Questions (FAQ)
Can I paint my bedroom while pregnant? It’s generally recommended to avoid painting during pregnancy due to the potential exposure to harmful fumes. If you must paint, ensure good ventilation, wear a mask, and take frequent breaks. Low-VOC or zero-VOC paints are safer options.
How long should I wait before sleeping in a freshly painted bedroom? Wait at least 24-72 hours after painting a bedroom before sleeping in it to allow the paint fumes to dissipate. Ensure good ventilation by opening windows and using fans.
How can I fix paint drips on my walls? To fix paint drips on walls, wait for the paint to dry completely. Then, use a fine-grit sandpaper to gently sand down the drips until they are flush with the rest of the wall. Finally, touch up the area with a small amount of paint to blend it in.
What are VOCs, and why should I care about them? VOCs (Volatile Organic Compounds) are chemicals released into the air from paint that can be harmful to your health. Low-VOC or zero-VOC paints are better for air quality and reduce health risks.
How do I choose the right size roller for painting walls? A 9-inch roller is suitable for most bedroom walls. Smaller rollers, like 4-inch or 6-inch, are ideal for tight spaces and trim.
Armed with these bedroom painting secrets and pro insights, you’re ready to unleash your inner artist and sculpt your sanctuary into a haven of style and welcome. Savor the creative journey of your DIY bedroom makeover and bask in the rewarding glow of a beautifully completed project!
Hi, I’m Florence Disha, the creator behind HomesMend.com. With a passion for making every house a home, I share my personal experiences, tips, and expertise to help you transform your living spaces. Whether it’s practical advice, creative ideas, or tried-and-true solutions, my goal is to inspire and guide you in creating a home that feels just right. Let’s make every corner of your space truly yours!